


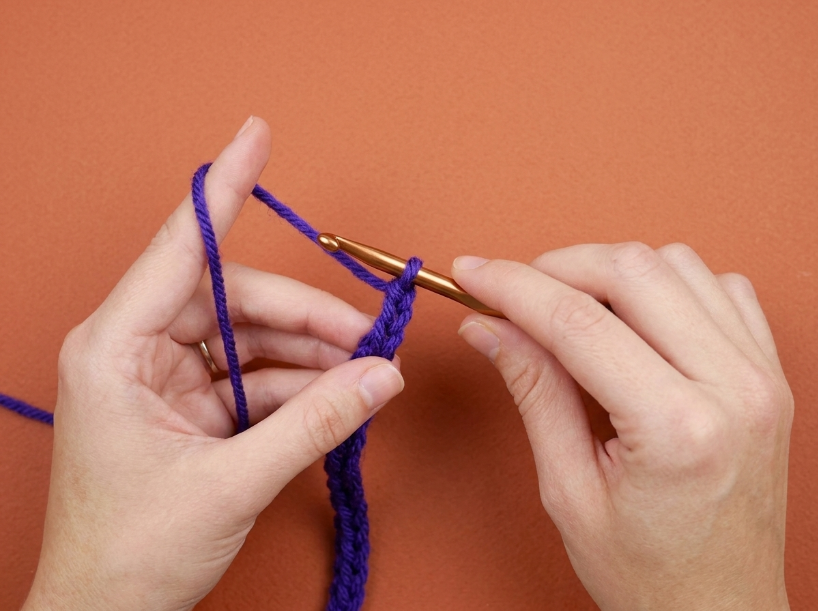
The fabric pulls inward at the edges no matter how carefully you count stitches. The gauge swatch measures two stitches per inch off from the pattern. The finished piece looks lumpy in spots where the tension shifted mid-row without you noticing.
The Short Answer
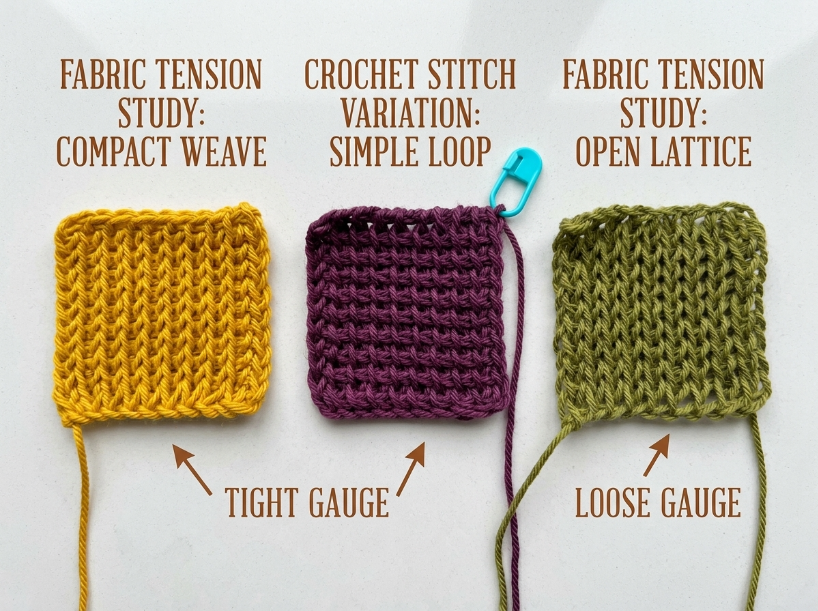
Tension controls stitch size, which affects how the finished fabric lies and behaves. Tight tension compresses stitches and can contribute to edges curling or folding inward, while loose tension creates a more open fabric with greater drape but can also affect gauge and make stitches less consistent.
Main Steps
Most guides tell you to practice until your tension becomes consistent, and that advice works when you’re learning the basic motion of wrapping yarn around a hook. The muscle memory develops over time, and eventually your hands settle into a rhythm that produces similar-sized stitches row after row. That said, consistent tension doesn’t automatically mean correct tension for the project. A blanket worked with the same tight grip that produces firm amigurumi may become stiff or curl because the fabric may need a looser gauge for the desired drape.
The real starting point is understanding what tension actually controls. When you work with tighter yarn tension, the loops you form tend to be smaller, producing more compact stitches and a denser fabric. Tight stitches have less flexibility, which is useful for amigurumi because a dense fabric helps prevent stuffing from showing through. Looser tension generally produces larger stitches and a more open fabric with greater drape, which can be useful for projects that need to feel soft and flexible.
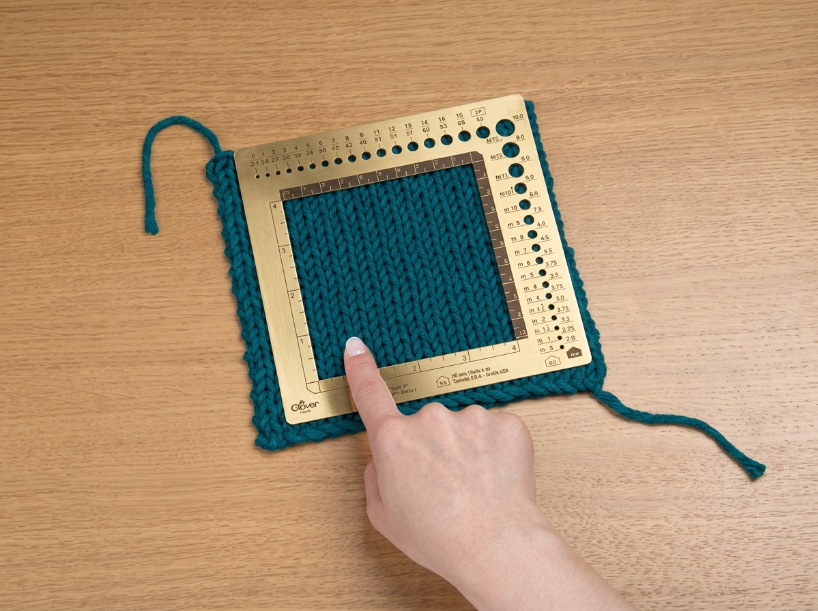
Gauge swatches measure whether your natural tension matches the pattern designer’s. Most patterns specify how many stitches and rows should fit into a four-inch square when worked with the recommended hook and yarn. If your swatch comes out smaller than the pattern calls for, your tension is tighter than the designer’s. If it measures larger, your tension is looser.
| Step | What to do | Watch out for |
|---|---|---|
| Make a gauge swatch | Work a 6-inch square in pattern stitch with recommended hook and yarn | Measure in the center, not at edges where tension often shifts |
| Count stitches and rows | Measure a 4-inch section and count how many stitches and rows fit | Partial stitches count if more than half the stitch is visible |
| Compare to pattern gauge | Check if your numbers match the pattern’s stated gauge | Even a small gauge difference can affect the finished size, especially in smaller projects |
| Adjust hook size | Go up one size if too tight, down one size if too loose | Hook size changes gauge without requiring you to consciously force your hands to work differently |
Comparison / Options
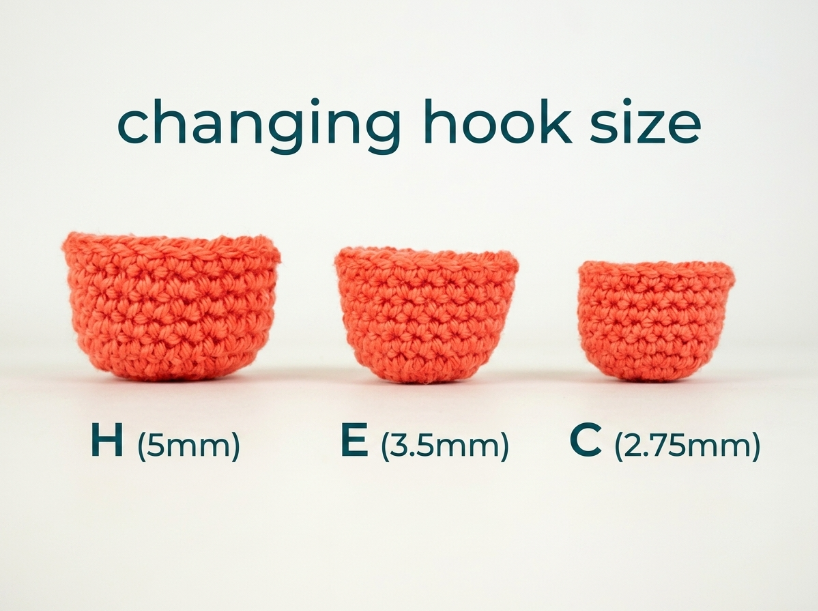
Changing hook size is a practical way to adjust gauge when your natural tension doesn’t match the pattern. Going up one hook size generally creates more space between stitches by producing larger loops, which allows the fabric to spread and relax. This works because the hook diameter affects the size of the loops formed during the stitch. A larger hook generally produces larger loops and a looser fabric, even if your natural yarn tension stays the same. The downside is that switching hook sizes changes the fabric’s drape and stitch definition. A project designed for a G hook worked with an H hook may have more visible gaps between stitches and less structural integrity.
Changing your grip pressure can help, but maintaining a deliberate tension throughout a project can take practice. The motion of wrapping yarn and pulling through loops happens too fast for conscious control once you’re working at normal speed. You can maintain looser tension for a few rows by deliberately relaxing your hold on the yarn, but the moment your attention shifts to counting stitches or following a pattern chart, your hands may return to their natural tension. In contrast, hook size stays constant without requiring ongoing mental effort. If you’re making a structured bag that needs tight stitches, a smaller hook can help create a firmer fabric.
Stitch choice affects how tension issues show up in the finished fabric. Single crochet generally creates a relatively dense fabric, especially when worked with a hook size that produces a firm gauge. Tight tension in single crochet can make the fabric even more compact, which may contribute to curling. Double crochet creates taller, more open stitches, so its fabric behaves differently from single crochet when tension changes. Yarn Under vs. Yarn Over: The Structural Guide to Crochet Stitch Anatomy breaks down how stitch construction changes fabric behavior.
Common Mistakes
The foundation chain is a common place for tension to cause problems, and the mistake isn’t always obvious until you start the first row. Most beginners chain tightly because it feels more controlled, but the starting chain often needs to be looser than the stitches worked into it. When you insert the hook into a tight chain, there’s less room to work into, which can distort the first row and contribute to a bottom edge that curls upward. One common solution is to use a hook one size larger for the foundation chain, then switch back to the pattern hook for the rest of the project. This gives the first row more room to be worked without changing the overall hook size.
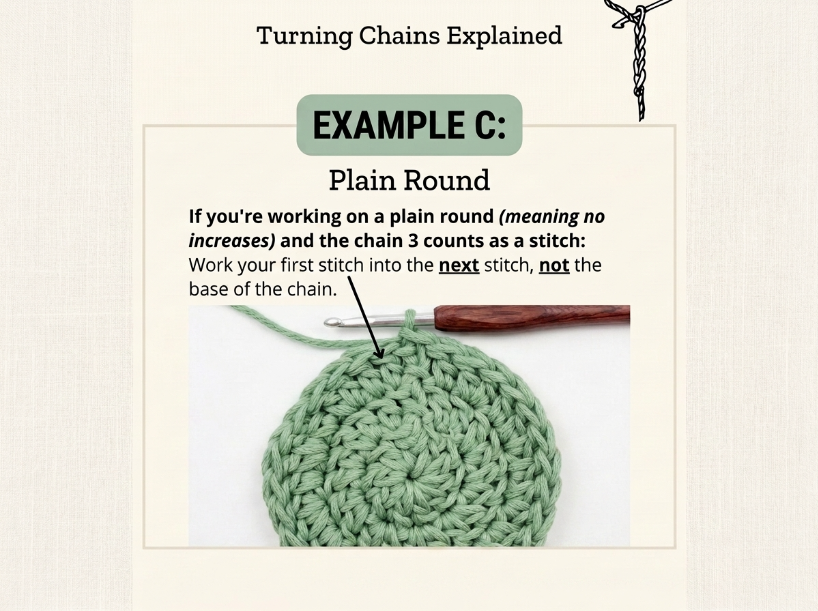
Turning chains can contribute to one-sided curl when the tension shifts between the end of one row and the start of the next. The turning chain needs to be appropriate for the height of the stitches in that row, while also maintaining reasonably consistent tension. If you pull the turning chain tighter than the rest of the row, that edge can draw inward and create a curve along one side of the fabric. The opposite problem can happen when the turning chain is too loose, which may make that edge flare outward or wave. Turning-chain tension can change unconsciously when you flip the work, which is one reason an edge may look different even when both sides use the same stitch count.
Trying to fix tension problems by adding or skipping stitches can make the fabric worse. When a piece curls inward, the instinct may be to add extra stitches to force the edge to lie flat. This can create ruffling instead of solving the curl because the extra stitches add more fabric along the edge. If the stitch count is correct, the issue may be related to stitch size, tension, hook size, the foundation chain, or the stitch pattern rather than the number of stitches. If the fabric ruffles, check whether you have too many stitches or whether your tension is too loose. Confusing these different causes can lead to unnecessary changes that distort the fabric further.
Troubleshooting
When a fabric curls inward along all edges, overly tight tension can be one possible cause. Check the yarn, hook size, stitch pattern, and foundation chain before assuming tension is the only issue. Tight tension can make the stitches more compact and reduce the fabric’s flexibility, which may contribute to curling or a cupped shape. If the fabric is too tight, try going up one hook size and make a small swatch to see whether the fabric becomes flatter and more flexible. A larger hook generally produces larger loops and a looser fabric, so it can help when your current fabric is too tight. In practice, going up two full hook sizes might make the fabric too loose and drapey, so test with one size first.
If only the bottom edge curls upward while the sides lie flat, the foundation chain may be tighter than the working rows. This happens because the starting chain has a different structure from a row of stitches, and it’s easy to pull the yarn tighter when you’re making chains without inserting the hook into existing fabric. A common fix is to redo the foundation chain with a hook one size larger, then switch to the pattern hook for row one. An alternative is to use a chainless foundation such as Foundation Single Crochet, which works the foundation chain and first row together. This can help avoid a tension difference between a separate starting chain and the first row.
When one side of the fabric curves inward more than the other, inconsistent turning-chain tension can be one possible cause. The edge with tighter turning chains may pull inward because those chains create a tighter section along the side of the work. The fix is to pay attention to how firmly you pull the yarn when making the turning chain at the start of each row. Some crocheters find it helpful to make the turning chain slightly looser than feels natural, which can compensate for the tendency to tighten up when flipping the work. This requires conscious effort until the looser turning chain becomes more familiar.
| Mistake | Why it happens | Fix |
|---|---|---|
| Entire piece curls inward like a bowl | Tension may be too tight, or the stitch pattern or fabric construction may encourage curling | Check your tension and try a larger hook on a small swatch |
| Bottom edge curls up, sides lie flat | Foundation chain may be tighter than working rows | Use a larger hook for the starting chain, or try Foundation Single Crochet |
| One side curves more than the other | Turning-chain tension may be inconsistent between rows | Make the turning chain slightly looser than the working stitches |
| Edges flare outward in waves | Too many stitches or excessively loose tension can add extra fabric | Check stitch count and tension before changing the pattern |
Questions You Might Still Have
The best way to develop consistent tension is to work on projects that use the same yarn weight and hook size repeatedly. Muscle memory can develop more easily when the physical motion stays consistent, because your hands repeatedly practice the same grip and yarn movement. Practicing with similar materials can help you become more comfortable producing even stitches. That said, this approach doesn’t eliminate the need to adapt tension to different yarn weights, which can require different hook sizes and handling.
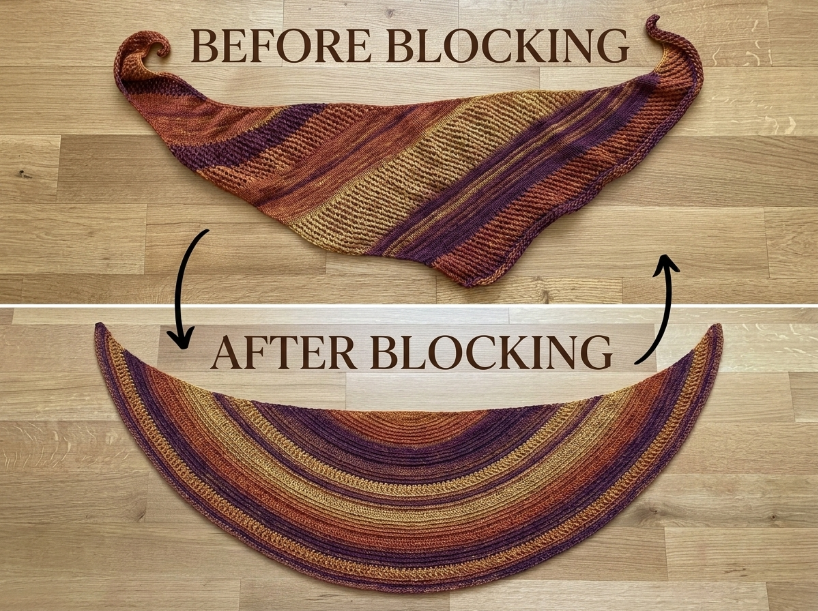
Blocking can temporarily flatten curled edges, but it doesn’t always fix the underlying tension problem. Wet blocking involves pinning damp fabric into shape while it dries, and it can work well with fibers such as wool and cotton. Acrylic can also be blocked, but excessive heat can permanently alter the fibers. Steam blocking acrylic should therefore be done carefully, because too much heat can change the yarn’s texture and elasticity.
Questions You Might Still Have
Q: What is the easiest way to improve tension control for a beginner?
Work small projects in single crochet with worsted-weight acrylic and a medium-sized hook until your stitch size stays consistent across multiple rows. Single crochet can make changes in stitch size relatively easy to notice because the stitches are short and closely spaced. Worsted-weight yarn and a medium-sized hook are often good choices for beginners because the stitches are large enough to see and count clearly. Practicing with these materials can help build familiarity with consistent tension. Once you can consistently produce similar-sized stitches and your swatch matches the pattern’s gauge, you have a good baseline for adjusting to different yarn weights.
Q: How long does it take to develop consistent tension from start to finish?
How quickly you develop consistent tension depends on how often you crochet, the yarn and hook sizes you use, and how much you practice. With regular practice, many crocheters become more consistent over time as the movements become more familiar. Switching between very different yarn weights and hook sizes can require you to adjust your tension again.
Q: What hook size and yarn weight do I need for learning tension control?
Worsted-weight yarn (weight 4) with a medium-sized hook, such as a 5 mm hook, can be a practical combination for learning tension because the stitches are large enough to see and count easily. The best hook size depends on the yarn, stitch pattern, and fabric you want to create. Once your tension becomes consistent, you can practice with different yarn weights and hook sizes to learn how your tension needs to adapt.
Q: What are the most common mistakes when working on tension control?
Gripping the yarn too tightly in the non-hook hand can restrict yarn flow and make stitches smaller and more compact, which may contribute to curling. Another common mistake is trying to fix curling by adding extra stitches instead of first checking tension, hook size, and the stitch pattern, which can create ruffled edges. A third common issue is working the foundation chain too tightly, which can contribute to the bottom edge curling upward because the chain may not provide enough room for the first row.
Q: How do I fix it if my tension becomes inconsistent mid-project?
Stop and work a fresh gauge swatch with the same yarn and hook to check whether your current tension matches the beginning of the project. If the swatch measures differently, your tension may have shifted to a tighter or looser grip without you noticing. You can try adjusting your yarn handling or changing the hook size to compensate. If the project is small enough, ripping out and restarting with the adjusted hook size may produce a more consistent fabric than trying to blend two noticeably different tensions in the same piece.
Q: Is there a faster method for achieving even tension?
There isn’t a single shortcut that replaces practice, but changing how you hold and feed the yarn can sometimes make tension more comfortable and consistent. Some crocheters find that holding the yarn differently, such as over the index finger or woven through multiple fingers, changes how easily the yarn flows. Testing different holds can help you find a method that feels natural and gives you better control.
📅 Last reviewed: August 2026
Summary
Tension controls stitch size, which affects how the finished fabric lies and behaves. Tight tension can contribute to curling by creating a more compact fabric, while loose tension creates a more open fabric with greater drape but can also affect gauge. Hook size is a practical way to adjust gauge, and a foundation chain that is too tight can contribute to bottom-edge curl. When troubleshooting, check your tension, hook size, stitch count, foundation chain, and stitch pattern rather than assuming a single cause. This article is reviewed every 12 months.

