


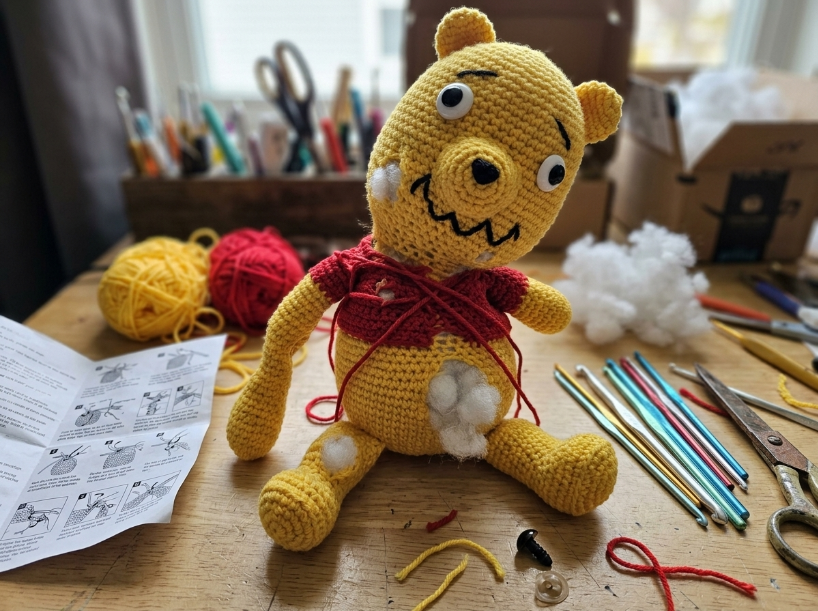
Stitch count can be perfect, stuffing evenly distributed, and tension consistent throughout, yet the finished piece still reads as visually off. The head tilts at an odd angle, limbs attach unevenly, or the body shape bulges in ways the pattern never predicted.
The Short Answer
Most “weird-looking” amigurumi results from misaligned limb placement, inconsistent tension between body sections, or incorrect stitch counts in shaping rounds. The pattern itself is usually correct, but small execution errors compound across rounds and become obvious only after assembly.
How to Spot the Problem
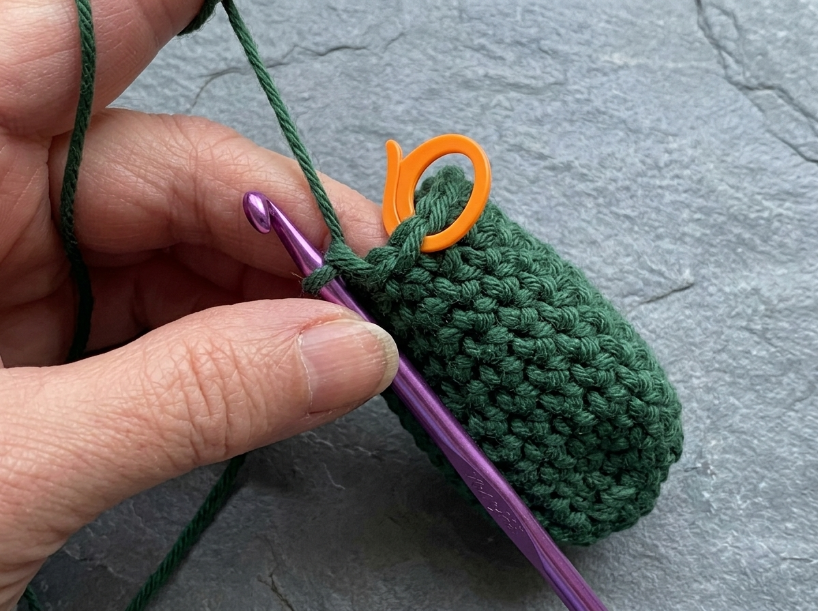
Start by verifying stitch counts in every increase and decrease round. A single missed stitch in round 8 won’t look wrong immediately, but by round 15, the piece can warp noticeably. The fabric pulls tighter on one side or bulges where it should curve smoothly. Recounting as you work catches errors before they multiply.
Check that your hook size matches the yarn weight tightly enough to prevent stuffing from showing through. Amigurumi requires denser fabric than flat projects, which is why patterns often call for a hook one or two sizes smaller than the yarn label suggests. If you can see white polyester fiberfill between stitches when you hold the piece up to light, the fabric is likely too loose. That said, going too tight makes the fabric stiff and difficult to shape, especially around curves like the head or body. If your hands ache after a few rounds, try going up half a hook size and testing the fabric density again.
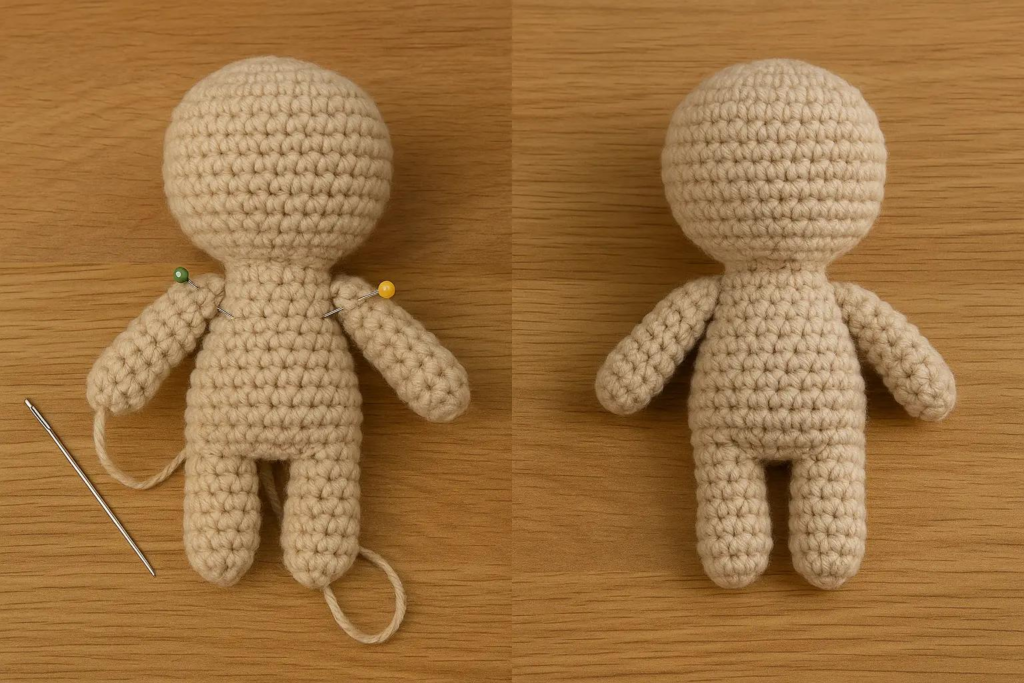
Limb placement determines whether the finished piece looks balanced or lopsided. For symmetrical designs, both arms are often positioned at corresponding heights on opposite sides of the torso, with placement adjusted according to the body’s circumference and the desired proportions, and centered visually using the face or safety eyes as anchors. Why Your Amigurumi Looks ‘Inside Out’ walks through the exact alignment process if symmetry is the main issue. Most guides recommend counting rounds from the neck down to find the attachment point, and that works for simple cylindrical bodies. In practice, bodies with tapered waists or rounded bellies often require visual centering rather than strict round counting, since the fabric curves differently depending on stuffing firmness.
| Symptom | Likely cause | Fix |
|---|---|---|
| Warped shaping | Missed stitches in increase/decrease rounds. | Recount stitches frequently. |
| Stuffing shows through | Tension is too loose for the hook size. | Switch to a smaller hook to tighten the fabric. |
| Limbs look lopsided | Relying only on round counts instead of visual centering. | Pin limbs in place before sewing. |
| Distorted or sagging fabric | Overstuffing or understuffing the piece. | Add stuffing gradually and shape as you go. |
Root Causes
Yarn fiber and construction can affect how much a finished piece stretches and recovers after stuffing. Some cotton blends offer a good balance of structure and flexibility, helping geometric designs stay crisp while allowing organic shapes to curve smoothly. In contrast, highly elastic yarns can make it harder for the fabric to hold strict definitions over time. Rather than assuming one fiber type is universally superior, test your chosen yarn with a small sample to see how it behaves under tension.
Hook size directly affects whether the finished piece looks tightly structured or loose. A 3.5mm hook with worsted weight yarn is a common starting point. Going up to 4mm can loosen the fabric enough that stuffing becomes visible, especially around increase rounds where stitches naturally spread apart. Going down to 3mm tightens the fabric further, which helps prevent stuffing show-through but can also make the piece harder to stuff evenly. The Leaning Stitch explains how continuous rounds interact with hook size when details appear to slant.
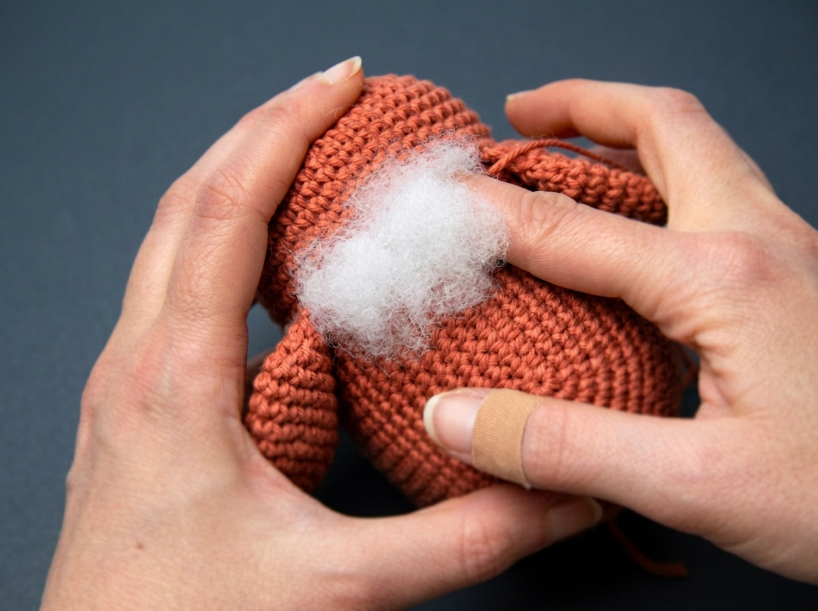
Most patterns call for polyester fiberfill because it is washable, accessible, and compresses well for small pieces. Even so, polyester can clump if you add too much at once, creating lumps that show through the fabric. Adding small amounts gradually and distributing them evenly helps produce a smoother result.
Common Mistakes
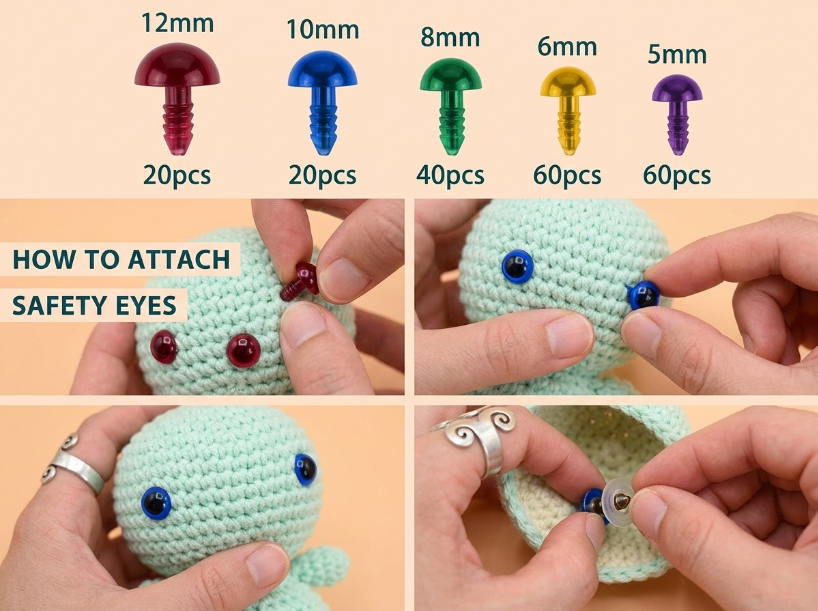
Placing safety eyes after stuffing the head is a very common assembly error. With traditional safety eyes and locking washers, the washer needs to be fitted from inside the head before the opening is closed. The fix is to insert the eyes before stuffing or closing the head, while you can still access the inside. This requires visualizing the finished face placement while the head is still an empty shell.
Inconsistent tension between body parts makes some sections look tighter or looser than others, creating visual imbalance even when stitch counts are correct. The head might be worked with relaxed tension while the body is worked tightly, making the head appear oversized relative to the torso. Tension naturally varies between sessions, especially if you crochet when tired or distracted. A helpful approach is to work each major piece in a single session when possible, so tension stays consistent within that element.
Overstuffing distorts the fabric by stretching stitches beyond their natural shape. The piece becomes rigid and loses its intended proportions, with increase rounds spreading wide and creating visible gaps. Understuffing causes the opposite problem, where the piece collapses or sags because the fabric lacks internal support. A well-stuffed piece should feel firm while still allowing the fabric to retain its intended shape without looking stretched. The exact firmness depends heavily on the project’s purpose.
Troubleshooting
If the head tilts forward after attaching it to the body, the neck attachment may be too weak to support the weight. Sewing through both the head and body multiple times in a tight circle reinforces the joint, but this only works if the head is not overstuffed. A head packed too firmly cannot compress enough to create a stable connection. Removing some stuffing from the base of the head before reattaching it allows the fabric to mold around the neck and distribute weight more evenly.
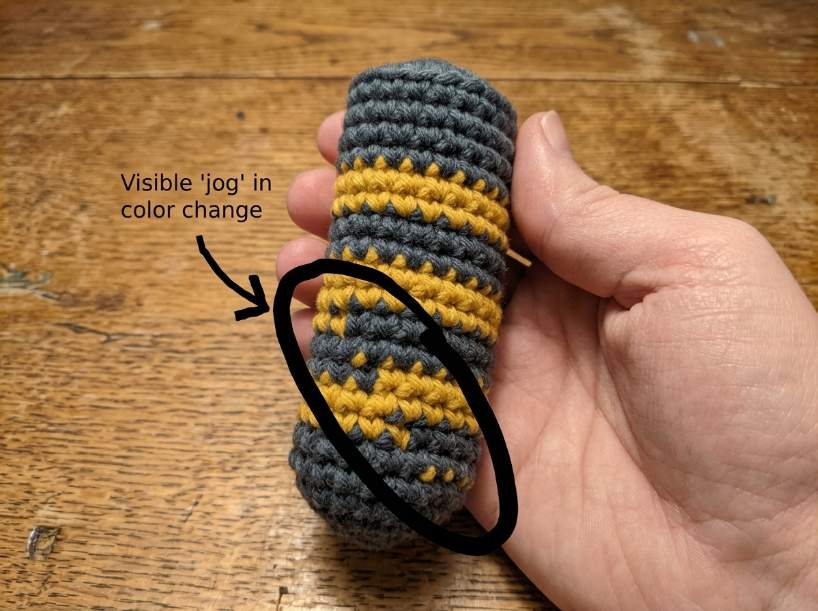
If details on a limb, such as a thumb, color change, or decrease line, appear crooked or slanted, the continuous spiral can contribute to the visual drift. The beginning of each round advances around the piece, so vertical details may gradually shift position. Shift stitches can help reposition the beginning-of-round marker and place those details more consistently. However, if the entire limb is physically attached at the wrong height or angle, shift stitches will not fix the asymmetry. You will need to unpick the seam and reattach the limb at the correct alignment.
Bulges or flat spots in the body usually indicate uneven stuffing distribution. Polyester fiberfill clumps when added in large handfuls, creating dense pockets that push the fabric outward in some areas while leaving other areas hollow. The fix is to add stuffing in small pinches and use a blunt tool like a chopstick or crochet hook handle to push fiberfill into corners and curves. If the bulge persists after restuffing, the fabric itself may be stretched from overstuffing earlier.
Choosing the Right Method
The most reliable option for avoiding weird proportions is to work a test swatch using the exact yarn and hook size the pattern calls for. This reveals whether your natural tension matches the designer’s expectations. The test piece does not need to be a full body, just enough rounds to see whether the fabric density looks right and whether stitches stay tight after stuffing. If you are working from a pattern you have used successfully before with the same materials, skipping the test saves time without adding risk.
Questions You Might Still Have
Q: What is the easiest way to diagnose what makes an amigurumi look weird?
Pin the finished piece to a flat surface and photograph it from the front, side, and top. Compare the photos to the pattern’s reference image. Asymmetry, tilting, or proportion issues become obvious in photos that are hard to see while holding the piece. Check limb placement first, then stitch counts in shaping rounds, then stuffing density.
Q: How long does fixing a weird-looking amigurumi take from start to finish?
The time required depends entirely on the size of the error. Reattaching a single limb might only take a few minutes, while restuffing an entire body to fix lumps or flat spots can take significantly longer. Reworking a section with incorrect stitch counts depends on how many rounds back the error started.
Q: What hook size and yarn weight do I need for standard amigurumi?
Many patterns use worsted weight yarn with a 3.5mm or 4mm hook. The exact hook size depends on your natural tension. If stuffing shows through the fabric when you hold it up to light, go down half a hook size. If the fabric feels stiff and difficult to shape, go up half a size. Test on a small piece before committing to a full project.
Q: What are the most common mistakes when assembling amigurumi?
Attaching limbs at different heights creates obvious asymmetry. Inserting safety eyes after stuffing makes them impossible to secure properly. Overstuffing stretches the fabric and creates gaps between stitches. Inconsistent tension between body parts makes some sections look tighter or looser than others. Each of these is much easier to prevent than to fix after assembly.
Q: How do I fix it if an amigurumi piece looks wrong after assembly?
Unpick the seams carefully and reattach limbs using the face or safety eyes as a visual center point. Pin pieces in place before sewing to check alignment from multiple angles. If the fabric itself is distorted from overstuffing, remove some fiberfill and allow the stitches to relax back to their natural shape.
Q: Is there a faster method for assembling amigurumi without alignment issues?
Pinning all pieces in place before sewing any seams lets you check the overall proportions and make adjustments before committing. This takes an extra few minutes upfront but prevents the need to unpick and reattach pieces later. Some crocheters mark the center front of the body with a stitch marker or contrasting thread to use as a reference point for symmetrical placement.
📅 Last reviewed: August 2026 · This article is reviewed every 12 months.
Summary
An amigurumi that looks visually off is usually the result of inconsistent tension, inaccurate stitch counts during shaping rounds, or improper limb placement during assembly. You can prevent these issues by checking fabric density early, recounting stitches frequently, and pinning pieces symmetrically before sewing. Correcting execution errors step-by-step ensures the finished toy matches the intended pattern shape.

