


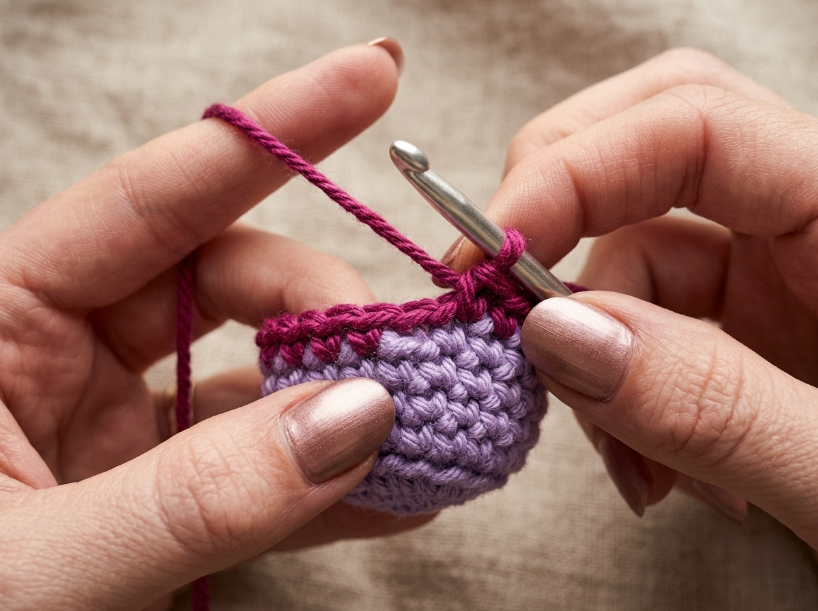
Finishing a round in amigurumi without a visible seam requires more than tight tension and a neat fastening off. The spiral structure of continuous rounds can create a natural step at the color-change line, while the final round can benefit from a deliberate finishing technique to reduce the visible bump where the last stitch meets the beginning of the round.
The Short Answer
The invisible finish can reduce or hide the step at the end of a continuous-round piece. Seamless color-change techniques reduce the abruptness of a color transition, while dedicated jogless methods are used when you want stripes to align more vertically. An invisible finish and a jogless color change solve different problems. The invisible finish is primarily used to close the final round neatly, while color-change and jogless techniques address the visible transition created when changing colors in continuous rounds.
What to Look For
A well-executed invisible join can create a smooth, low-profile transition between the last stitch and the beginning of the round, minimizing the visible bump or gap. The invisible join uses the yarn tail and a tapestry needle to create a replacement stitch that blends the last stitch into the beginning of the round. The exact needle path varies by finishing method. The yarn tail should sit flush with the fabric surface, and the join should blend into the surrounding stitches when viewed from the right side.
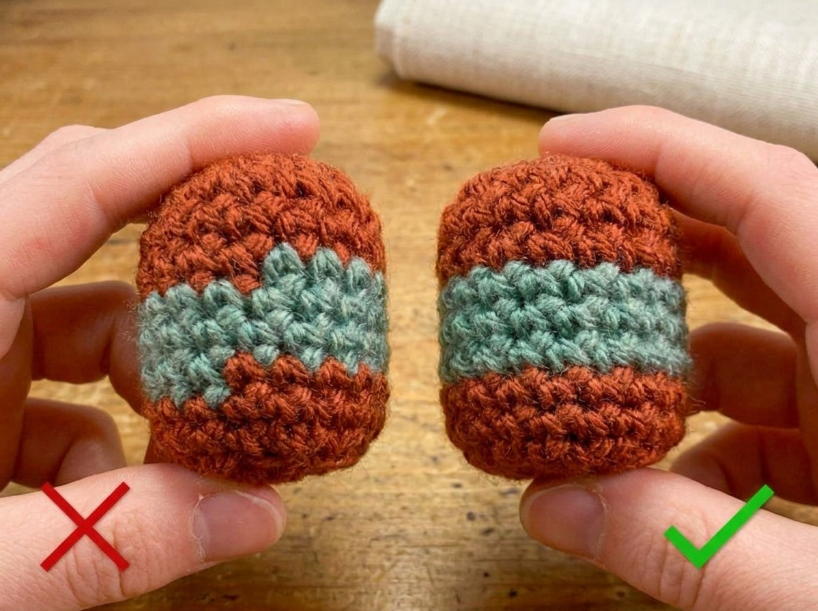
Checking the join from multiple angles ensures it sits flat. That advice holds true for single-color pieces where the join is purely structural. In practice, color-change projects reveal the join more visibly because the yarn tail color contrasts with the new round. If you are working striped amigurumi or color-block designs, the invisible join alone will not necessarily prevent the color jog from appearing at the color transition. Because continuous rounds are worked as a spiral rather than closed at the end of each round, the color-change point shifts vertically as the work progresses, creating the characteristic color jog.
Results can vary with yarn fiber and twist. A tightly twisted cotton yarn creates a crisper stitch definition, making the join easier to hide because the stitches hold their shape. Loosely spun acrylic can blur the join slightly, which helps camouflage small imperfections but can make it harder to see exactly where to insert the needle. If your join looks loose or uneven, check whether the yarn tail was pulled too tightly or left too slack. The tail should close the gap without distorting the surrounding stitches.
Side-by-Side Comparison
| Technique | Best for | Main downside | Effort level |
|---|---|---|---|
| Invisible join | Closing the final round of a single-color piece (head, body, limbs) | Does not fix the color jog in striped or color-block designs | Low – requires only a tapestry needle and basic weaving |
| Standard seamless color change | Swapping colors mid-project without a visible step at the round boundary | Does not necessarily eliminate the jog in continuous rounds | Low – worked during the stitch itself with no extra tools |
| Jogless color change (slip stitch) | Realigning the spiral after a color change to minimize the visible step | Adds an extra step at the start of each new color round | Medium – requires tracking the first stitch and working a slip stitch |
| Jogless color change (shift/adjustment method) | Keeps the color transition better aligned by changing where the round effectively begins. The exact method varies by pattern and stripe design. | The exact adjustment depends on the stripe design and pattern. | Medium – requires recalculating the round start position |
Per-Option Analysis
The invisible join is a useful finishing technique for closing the final round of a single-color amigurumi piece when you want to minimize the visible join or bump. The technique is primarily used for the final round, since the yarn is normally cut and the tail is woven in afterward. It is therefore not practical when you need to continue crocheting immediately into the next round. If you need to close a round temporarily to check the shape before continuing, pin the last stitch to the first stitch with a stitch marker instead.
The standard seamless color change is commonly used for swapping yarn colors mid-project because it avoids tying the two colors together at the transition point and can produce a cleaner color change. Complete the last stitch of the old color through the final yarn over with the new color, then continue the next round in the new color. A seamless color change can make the transition cleaner, but it does not necessarily make horizontal stripes perfectly level in continuous rounds. If precise vertical alignment matters, use a jogless-stripe technique designed for that purpose.
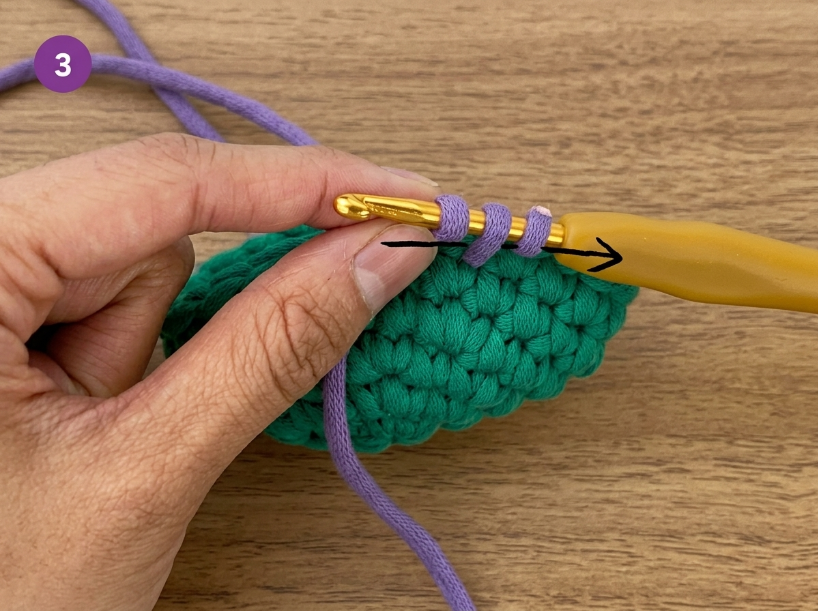
One slip-stitch-based jogless method realigns the color transition by working a slip stitch at the start of the new color round. This changes the position of the color transition slightly and can reduce the visible jog, helping the stripe appear more vertically aligned. Depending on the technique and tension, the slip stitch can create a slightly different-looking or raised stitch at the adjustment point, and the adjustment must be repeated at the start of every new color round. If the bump bothers you, another jogless or shift-based method may be preferable, depending on the stripe design and pattern instructions.
Choosing the Right Method
Use the invisible join when you are closing the final round of a single-color piece and want the finish to blend seamlessly into the fabric. Use the standard seamless color change when you need to swap yarn colors mid-project and want a cleaner transition without a bulky knot or obvious color break. Use a slip-stitch-based jogless method when you are working a striped or color-block design and want to reduce the visible jog and make the color transition appear more vertically aligned. If you are following a pattern that already includes color jog adjustments, stick with the pattern’s method.
Questions You Might Still Have
Q: Which option is better for a beginner starting with amigurumi finishes?
The invisible join is usually the easiest technique to learn because it requires only a tapestry needle and basic weaving skills. Most beginner patterns include single-color pieces where the join is purely structural. If you are working a striped or color-block design, start with the standard seamless color change and accept that the jog will appear. Once you are comfortable with the basic color swap, you can try a slip-stitch-based jogless method to reduce the visible jog.
Q: What are the main differences when comparing invisible joins and seamless color changes?
The invisible join closes the final round of a piece by threading the yarn tail to create a replacement stitch that blends the last stitch into the beginning of the round. The standard seamless color change swaps yarn on the final pull-through of the last stitch before the new color begins. The invisible join is a finishing technique used once at the end of a piece, while the seamless color change is used mid-project every time you swap colors.
Q: Which version of amigurumi finishes lasts longer with regular use?
The invisible join creates a secure finish that holds up well to stuffing pressure and handling because the yarn tail is woven through multiple stitches. The seamless color change is primarily an appearance technique rather than a structural reinforcement. For durability, secure fastening and properly woven-in ends matter more than whether the color transition is perfectly jogless.
📅 Last reviewed: August 2026 · This article is reviewed every 12 months.
Summary
Finishing a round in amigurumi involves specific techniques to address the natural spiral structure of continuous rounds. The invisible finish can create a smooth, low-profile finish for single-color pieces, while standard seamless color changes prevent visible knots when swapping yarns mid-project. Because continuous spirals can create a visible offset at the color boundary, techniques such as slip-stitch or other jogless adjustments can help keep stripes more vertically aligned. Understanding which technique fits the project prevents visible bumps, gaps, and uneven color transitions.

