


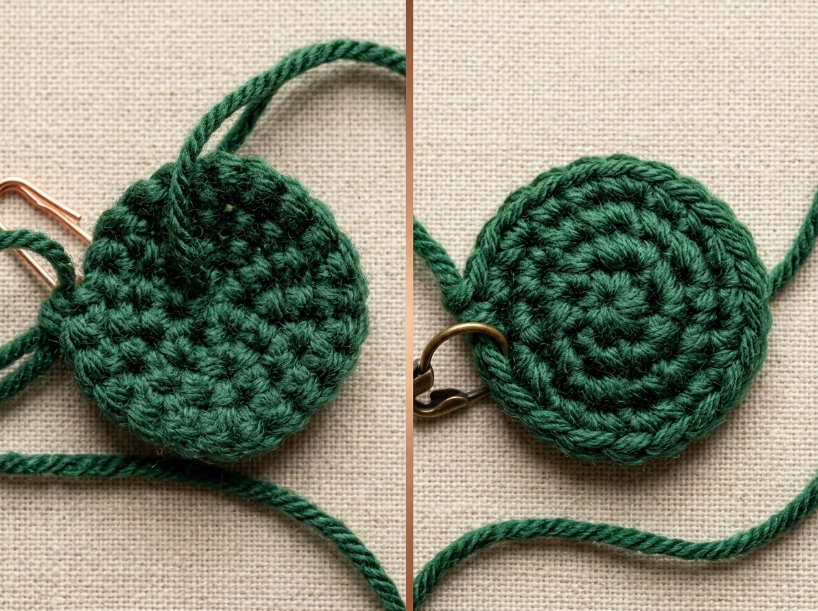
Amigurumi pieces sometimes emerge from the hook with the texture facing the wrong direction, the stuffing visible through gaps, or the overall shape reading as lumpy rather than smooth. The fabric structure itself is sound, but the visual finish signals that something in the construction went off track. Most of these issues trace back to recurring mistakes that beginners make without realizing the long-term effect on the finished toy.
The Short Answer
The inside-out appearance stems from working on the wrong side of the fabric without flipping it. Other common issues, like visible stuffing or permanent crown holes, usually result from using a hook too large for the yarn weight or skipping the magic ring. Tension inconsistencies and incorrect stitch placement also distort the shape. Each mistake has a specific fix that works immediately once you identify the root cause.
How to Spot the Problem
Most guides tell you to check your tension first when a piece looks off, and that advice holds true when the fabric feels loose or the stitches vary in size from round to round. Consistent tension creates an even surface where each stitch sits at relatively the same height and width as its neighbors. In practice, tension alone does not explain why the texture appears reversed or why the smoother side of the fabric ends up hidden inside the toy. That symptom points to working on the wrong side of the piece, which happens when you do not flip the work at the correct stage.
Stuffing visibility through the stitches signals a different issue. The yarn and hook combination determines how tightly the stitches lock together, and a hook that is too large relative to the yarn weight leaves gaps wide enough for polyester fill to push through. If you are also troubleshooting structural issues beyond surface texture, Why Your Amigurumi Looks Weird walks through how stitch count and shaping errors compound across rounds.
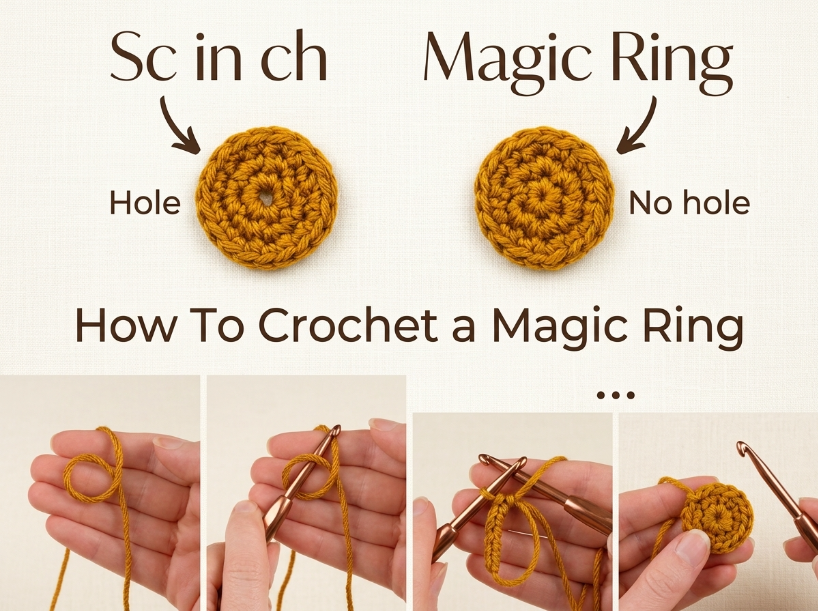
The magic ring versus chain-2 starting method creates a visible difference at the center of spherical pieces like heads or bodies. A chain-2 start often leaves a small opening at the top of the piece. Unlike a magic ring, it does not provide an adjustable loop that can be pulled completely closed, although the opening can often be reduced by weaving the yarn tail through the surrounding stitches. Some patterns specify one method over the other, but if the pattern does not clarify and you default to a chain start, the finished piece may have a permanent gap at the crown.
| Symptom | Likely cause | Fix |
|---|---|---|
| Texture facing inward, smooth side hidden | Working on the wrong side of the fabric | Turn the piece inside out after the first few rounds so the right side faces outward |
| Stuffing visible through stitches | Hook size too large for yarn weight | Drop down one or two hook sizes to tighten the fabric |
| Small hole at the top of the head or body | Started with chain-2 instead of magic ring | Use a magic ring for the first round and pull the tail tight to close the center |
| Uneven surface with some stitches taller than others | Inconsistent tension or skipped stitches | Count stitches at the end of each round and maintain steady hand pressure |
Root Causes
The wrong-side issue happens because amigurumi is worked in continuous spiral rounds without turning. As you work continuous spiral rounds, the piece can naturally curl inward, causing the right side of the fabric to end up on the inside of the tube. If this happens, the piece needs to be turned so the intended side faces outward. Many amigurumi patterns are designed with the smoother right side facing outward, but the pattern may not explicitly explain how to maintain that orientation. Beginners often continue working with the textured side facing them. The smooth side ends up trapped inside the toy, and the bumpier reverse side becomes the exterior. That said, some crocheters prefer the texture of the reverse side and intentionally leave it facing out. The choice depends on the look you want, but the default expectation for amigurumi is the smooth side showing.
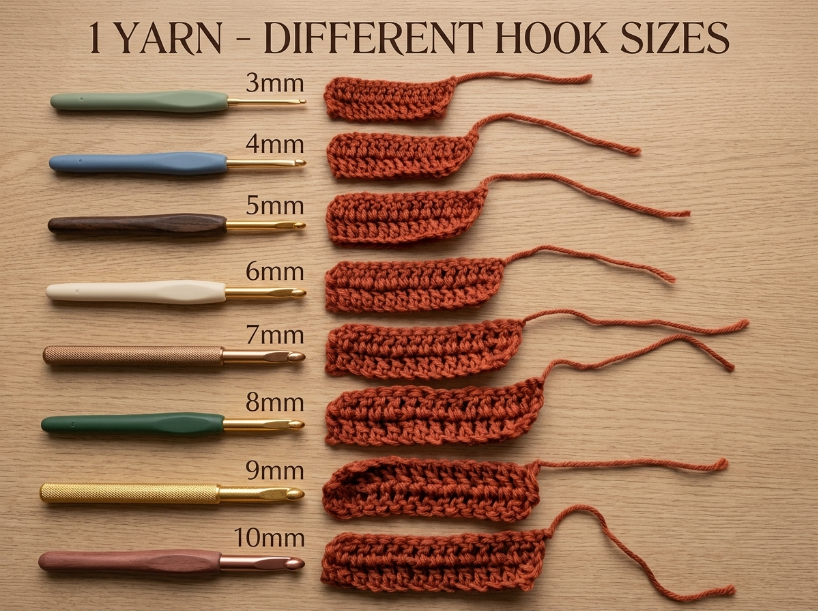
Hook size relative to yarn weight controls how much space exists between stitches. A 5mm hook paired with sport-weight yarn creates a loose fabric where the individual stitches spread apart under the pressure of stuffing. Dropping to a 3.5mm or 4mm hook with the same yarn tightens the weave and reduces the gaps. In contrast, using a hook that is too small makes the fabric stiff and difficult to stuff evenly, which can cause lumps where the fill compresses unevenly. The standard recommendation for amigurumi is to use a hook one or two sizes smaller than the yarn label suggests for flat projects.
The magic ring technique pulls the starting stitches into a tight circle, which is why it is the standard start for worked-in-the-round amigurumi. A chain-2 start creates a small loop that often cannot be cinched closed after the fact. Some patterns call for a chain start intentionally when the design includes a hat or other element that covers the top, but for standalone heads or bodies, the magic ring is usually preferred because it can close the center completely. If you are still learning the magic ring, a chain-2 start with careful weaving of the yarn tail through the center stitches can minimize the hole, though it rarely closes as tightly as a magic ring.
Fixes
Turn the piece inside out after completing the first three to five rounds. The right side of single crochet fabric is typically smoother and shows stitch definition more clearly, which is the finish most amigurumi patterns expect. Flipping the work early in the construction ensures the correct side faces outward for the rest of the piece. The catch is that turning the work can feel awkward if you are mid-round. Finish the current round, place a stitch marker at the beginning of the next round, and then flip the piece before continuing.
Switch to a smaller hook if stuffing is visibly pushing through the stitches. A hook one size smaller than the yarn label recommendation is the baseline for amigurumi, and dropping another half size tightens the fabric further if gaps persist. Even so, switching hooks mid-project can create a visible line where the stitch height changes. If you are already several rounds in, consider finishing the current section and making the adjustment at a natural transition point like the neck or a color change.
Use a magic ring for the starting round instead of a chain-2 when starting a sphere. The magic ring can pull closed completely when you tug the yarn tail, helping to eliminate the center hole. If the magic ring feels too difficult to control at first, practice the technique on a small swatch before starting your main project. Alternatively, start with a chain-2 and weave the yarn tail through the inner stitches multiple times to cinch the opening as tightly as possible.
How to Prevent It
Mark the beginning of each round with a stitch marker or a short length of contrasting yarn. Continuous spiral rounds make it easy to lose track of where each round starts, and working extra stitches or skipping stitches distorts the shape. Counting stitches at the end of every round helps catch errors before they compound across multiple rounds. Some patterns intentionally omit stitch marker instructions, assuming the crocheter will add them independently.
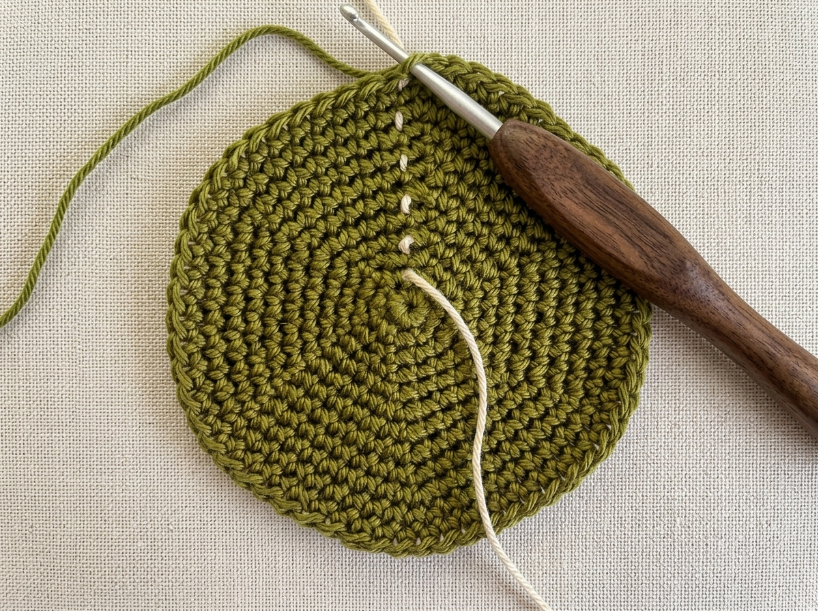
Check the right side of the fabric after the first three rounds. If the smoother side is facing inward, turn the piece inside out before continuing. Many amigurumi patterns are designed with the smoother right side facing outward, but the pattern may not explicitly explain how to maintain that orientation. In contrast, if the pattern specifies working with the wrong side facing out, follow that instruction, as some designs intentionally use the textured side for visual effect.
Test your hook size with a small swatch before starting the main piece. Work five rounds of single crochet in a spiral, stuff the swatch lightly, and check whether the stuffing is visible through the stitches. If gaps appear, drop down one hook size and test again. This approach adds a few minutes to the setup but prevents the frustration of realizing halfway through a project that the fabric is too loose.
| Item | Why | Budget option |
|---|---|---|
| Stitch markers | Tracks round beginnings in continuous spiral work | Short lengths of contrasting scrap yarn looped through the first stitch |
| Hook set with half sizes | Allows precise tension adjustments without buying individual hooks | Single hook one size smaller than yarn label recommendation |
| Polyester fiberfill | Standard stuffing material that does not easily compress or clump | Generic craft store fiberfill in bulk bags |
| Tapestry needle | Weaves in yarn tails and helps close magic ring openings tightly | Blunt-tip yarn needle from a basic sewing kit |
Questions You Might Still Have
Q: Why does the inside-out appearance keep happening even when I follow the pattern?
Many amigurumi patterns are designed with the smoother right side facing outward, but the pattern may not explicitly explain how to maintain that orientation. As you work continuous spiral rounds, the piece can naturally curl inward, causing the right side of the fabric to end up on the inside of the tube. If this happens, the piece needs to be turned so the intended side faces outward. If the pattern does not mention turning the work, add it to your process after completing the first three to five rounds.
Q: How do I fix the inside-out look without starting over?
Turn the piece inside out at any point in the construction. The fabric structure does not change when you flip it, so you can make the adjustment mid-project without affecting the stitch count or shaping. If you are several rounds in and the piece feels tight, stuff it lightly before turning to help the fabric stretch into the correct orientation.
Q: Is the inside-out appearance caused by tension, hook size, or the yarn?
The inside-out appearance is caused by working on the wrong side of the fabric, not by tension or materials. Tension and hook size affect fabric density and stitch visibility, but they do not change which side of the fabric faces outward. The fix is simply to turn the piece inside out so the smooth side shows.
Q: Will the inside-out look fix itself if I keep going, or do I have to rip back?
The orientation of the fabric will not correct itself as you continue working. You need to turn the piece inside out manually. You do not have to rip back any stitches, just flip the work so the smooth side faces outward and continue crocheting from that point.
Q: Does the inside-out appearance affect the whole project or just certain sections?
The inside-out appearance affects the entire piece if you do not turn it at the correct stage. Once you flip the work, the rest of the rounds will show the smooth side. If you turn the piece mid-project, the section worked before the flip will show the textured side, creating a visible line where the orientation changes.
📅 Last reviewed: August 2026 · This article is reviewed every 12 months.
Summary
The inside-out appearance, stuffing visibility, and center holes all trace back to specific construction choices rather than skill level. Turning the piece inside out after the first few rounds, using a hook size that creates dense fabric, and starting with a magic ring instead of a chain-2 can solve the most common beginner mistakes. These fixes work immediately and do not require advanced techniques. Once you understand why each issue happens, the adjustments become automatic.

