


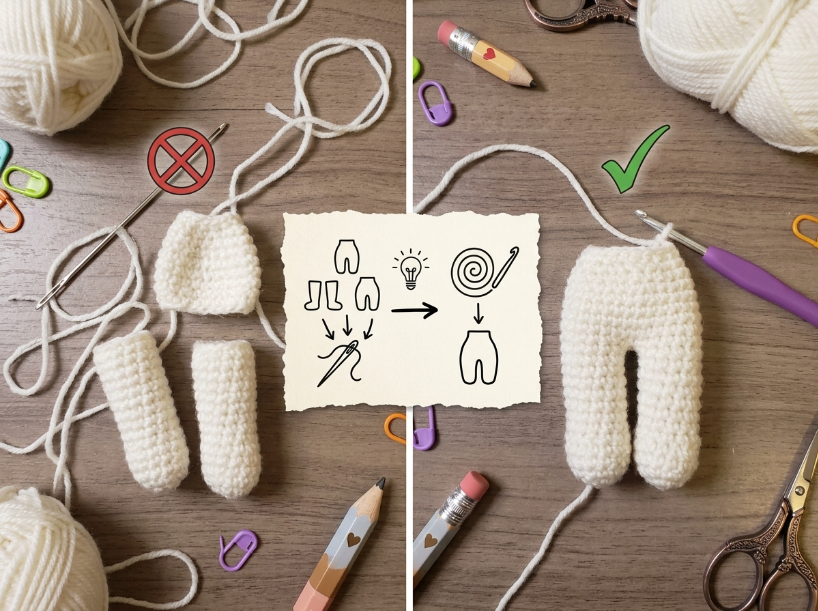
Many traditional crochet garment patterns assume you will be sewing pieces together at the end, but working in one continuous piece eliminates finishing time and can create a garment that moves more naturally with the body. The shift from flat construction to seamless requires understanding how stitch counts translate when you are no longer turning at the end of each row.
The Short Answer
Convert flat patterns to seamless by calculating round stitch counts, choosing a construction method like top-down raglan or contiguous set-in sleeves, and working in joined rounds with slip stitches to prevent spiral slant. Gauge should be checked both flat and in-the-round because tension often differs between the two methods.
Main Steps
Most guides recommend starting with a pattern already written for seamless construction, and that makes sense if you are new to working in the round. The stitch counts are already calculated, the shaping is mapped out round by round, and you avoid unexpected issues halfway through the yoke. That said, if the pattern you want doesn’t exist in seamless form, converting a flat pattern gives you access to thousands more designs and teaches you how shaping actually works in three dimensions.
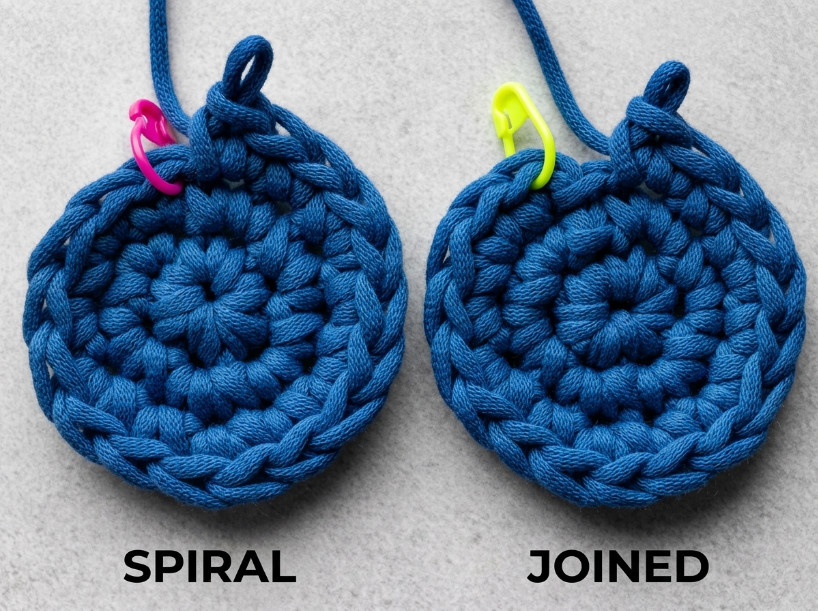
The first decision is choosing your construction method. Top-down raglan sweaters start at the neckline and work downward in joined rounds, which lets you try on the garment as you go and adjust sleeve length in real time. Contiguous construction creates set-in sleeves by working the yoke and body together, then dividing for sleeves. This can produce a more tailored shoulder line but requires more careful stitch count planning. For simpler projects like cowls or hats, you are just converting the flat stitch count to a round count and working continuously. If you are working a pattern that involves color changes or vertical design elements, Why Your Amigurumi Looks Weird explains how continuous rounds create spiral drift and when to switch to joined rounds instead.
Foundation single crochet can replace the starting chain and, when worked directly into a foundation for a tube, can eliminate the need to join a separate chain into a ring. Instead of chaining and working back into the chain, FSC creates a flexible foundation that can be more elastic and easier to work into evenly than a separate starting chain, depending on yarn and tension. This matters most for projects like seamless bags or the bottom edge of a sweater worked from the hem up, where the starting edge takes significant stress during wear.
| Step | What to do | Watch out for |
|---|---|---|
| Check gauge in the round | Work a tube instead of a flat swatch | Tension often tightens when working continuously |
| Calculate round stitch count | Determine the finished circumference, then use your in-the-round stitch gauge to calculate the required stitch count | Account for shaping and ease rather than simply doubling the flat-panel stitch count |
| Choose construction method | Top-down raglan for adjustability, contiguous for tailored fit | Raglan creates diagonal shoulder lines, contiguous needs precise planning |
| Mark round beginnings | Use a locking stitch marker or safety pin | Markers can shift during slip stitch joins |
| Test armhole shaping | Skip stitches or bind off mid-round for armholes | Skipped stitches create gaps, bind-offs create a defined edge |
Comparison / Options
Joined rounds with slip stitches help prevent the progressive spiral shift that occurs in continuous rounds, making them useful when stripes, colorwork, or other vertical design elements need to remain aligned. Each round ends with a slip stitch into the first stitch, then a turning chain brings you up to the correct height for the next round. The tradeoff is a visible seam where the slip stitch creates a small bump, and the turning chain can pull tighter or looser than the rest of the round depending on your natural tension. Continuous spirals eliminate the seam and can often work faster since you never stop to join. However, the round boundary advances with each pass, which makes stripes slant and shaping lines appear diagonal.
For garments with minimal shaping, continuous spirals work well. A simple pullover with straight sleeves and no waist shaping can be worked in one long spiral from hem to armhole, then divided for the body and sleeves. A cardigan with button bands, waist shaping, or other vertical design elements may benefit from joined or turned rounds when maintaining straight, predictable front edges is important. Short rows create shaping in seamless garments by working only part of a round, then turning and working back, which raises or lowers one section relative to the rest. This technique handles bust darts, curved hems, and shoulder slopes without separate pieces to seam. Depending on the short-row method, turning points can leave visible gaps or changes in tension. Different techniques can be used to minimize or close these openings.
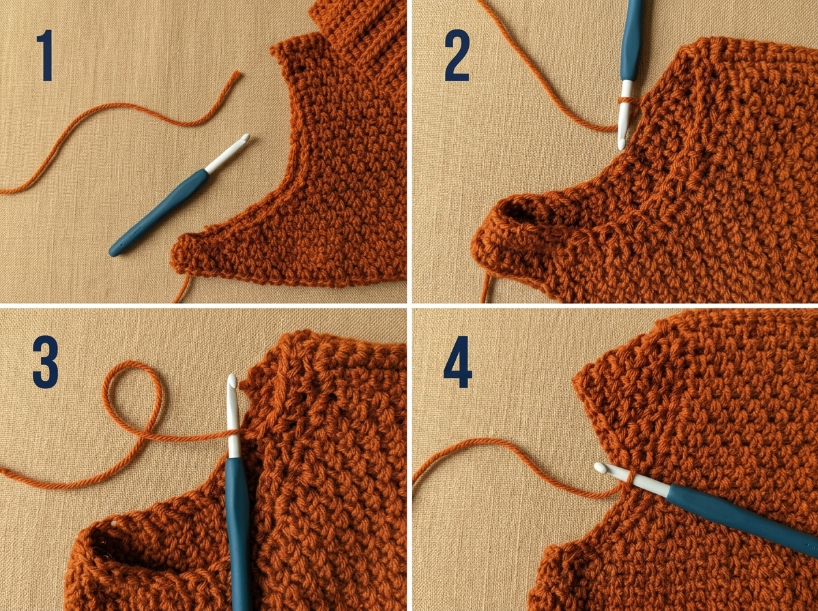
For ordinary crochet, a standard crochet hook is generally sufficient even when a garment has a large stitch count, because you work one stitch at a time rather than holding an entire round of live stitches on the hook. Long hooks with flexible cables are more relevant to Tunisian crochet and other techniques that require many live stitches to be held on the tool. If you are converting a pattern that was designed for seaming.
Common Mistakes
Forgetting to check gauge in the round is the most common error, and it causes garments to come out tighter or looser than the flat pattern predicted. Tension naturally changes when you are working continuously in one direction versus turning at the end of each row, and the difference can be substantial. Checking gauge flat and assuming it will hold in the round often leads to sweaters that don’t fit and can’t be fixed without ripping out the entire yoke.
Skipping ease stitches when converting from flat to round can produce garments that cling instead of drape. A flat pattern includes ease in the row count because fabric naturally relaxes when it is not under tension. When you work in the round, your hand and yarn-handling mechanics can differ from those used when turning rows, so your stitch gauge may change. If your in-the-round gauge is tighter, the finished circumference will be smaller unless you compensate with a different hook size or stitch count. Adding ease stitches compensates for this, but the exact number depends on the yarn’s elasticity and the stitch pattern’s natural drape, so swatching in the round is essential to find the right calculation.
Placing armhole shaping at the wrong point in the round creates off-center sleeves or armholes that gap at the underarm. The armhole bind-off needs to align correctly based on the pattern’s design, which often requires recalculating positions when moving from flat panels to a tube. If you are working a raglan, the increases should be evenly spaced in four positions around the yoke. Miscounting the spacing by even a few stitches throws off the symmetry and makes one sleeve attach differently than the other. The fix is to count carefully and use stitch markers at each shaping point before you start the increases or bind-offs.
| Mistake | Why it happens | Fix |
|---|---|---|
| Garment too tight | Tension tightens in the round | Check gauge in-the-round, add ease stitches |
| Spiral slant in stripes | Continuous rounds advance the start point | Switch to joined rounds with slip stitch |
| Visible seam at join | Slip stitch creates a bump | Use an invisible join technique or accept the seam |
| Armholes off-center | Miscounted spacing during conversion | Mark side seam position before binding off |
Troubleshooting
If the garment is too tight even though your gauge matched, check the finished measurements and intended ease before assuming the stitch count is wrong. You may need additional ease, a different construction, or adjustments to the stitch count depending on the design. The fabric needs room to move around the body, and differences between your flat and in-the-round gauge can change the finished circumference. If your in-the-round gauge is tighter, the garment will have less ease unless you compensate with a different hook size or stitch count. Adding ease stitches increases the round circumference without changing the stitch gauge, which gives the fabric the slack it needs to drape.
Gaps at armhole or neckline shaping points can occur when stitches are skipped or bound off in a way that does not match the intended construction. Skipped stitches can create an opening that is useful for shaping, but the surrounding stitches and subsequent rounds must be worked according to the design. Binding off those stitches instead creates a defined edge that can hold its shape more firmly, although the result still depends on the construction and tension. The tradeoff is that bind-offs are less elastic than skipped stitches, which matters if the neckline or armhole needs to stretch during wear. For garments that need stretch, work the bind-off loosely or use a stretchy bind-off method.
If vertical design elements slant despite working in joined rounds, the slip stitch join may be pulling tighter than the rest of the round and shifting the start point slightly with each pass. The fix is to work the slip stitch more loosely, or to use an invisible join technique that doesn’t create a bump. Invisible joins work the last stitch of the round, cut the yarn, and use a tapestry needle to mimic the top loops of the first stitch. This takes more time than a standard slip stitch join, but it can be worth it for colorwork or any project where the seam line would be obvious.
Questions You Might Still Have
Q: What is the easiest way to convert a pattern to seamless for a beginner?
Start with a simple hat or cowl pattern that is already worked flat in rows. Determine the finished circumference, then use your in-the-round stitch gauge to calculate the required stitch count, avoiding the complexity of armhole shaping while teaching you how tension changes when working in the round. Once you are comfortable with circular gauge and round counting, move to a basic top-down raglan pullover.
Q: How long does converting and working a seamless pattern take from start to finish?
Conversion time depends entirely on pattern complexity. Calculating stitch counts and mapping shaping adds upfront planning time, but you often make up for it by eliminating the need to seam pieces together at the end. A complex cardigan with colorwork will require significantly more adjustment time than a basic pullover.
Q: What hook size and yarn weight do I need for seamless construction?
Use the same hook size and yarn weight the original pattern calls for, but check your gauge in the round before starting the main project. Tension often tightens when working continuously, which may require going up half a hook size to match the flat gauge.
Q: What are the most common mistakes when converting patterns to seamless?
Forgetting to check gauge in the round causes the most fit issues, followed by skipping ease stitches and miscounting armhole spacing. Another frequent error is using continuous spirals for colorwork or vertical design elements, which creates diagonal slant instead of straight lines. Working joined rounds with slip stitches helps solve the slant problem but requires managing a visible seam.
Q: How do I fix it if the seamless conversion goes wrong?
If the garment is too tight, rip back to the yoke or body division and add ease stitches before continuing. If armholes are off-center, the only fix is to rip back to the armhole shaping and recount the spacing. For spiral slant in colorwork, you cannot fix it retroactively, but switching to joined rounds for the remaining colorwork sections will keep the problem from getting worse. Blocking can soften minor fit issues but will not correct major structural errors.
Q: Is there a faster method for seamless construction?
Continuous spirals often work faster than joined rounds because you never stop to slip stitch and chain up, but they are best suited for projects without vertical design elements. Top-down raglan construction is generally faster than contiguous set-in sleeves because the shaping is simpler and requires less calculation. Using foundation single crochet instead of a starting chain eliminates one finishing step and can create a more flexible foundation, depending on the yarn and tension.
📅 Last reviewed: August 2026 · This article is reviewed every 12 months.
Summary
Converting flat patterns to seamless requires checking gauge in the round, calculating circumference stitch counts with ease, and choosing between continuous spirals for speed or joined rounds for vertical alignment. Top-down raglan construction offers the most adjustability during the project, while contiguous set-in sleeves produce a more tailored fit but require precise planning. The choice often shifts from joined rounds to continuous spirals when the project has no colorwork or vertical design elements and speed matters more than a perfectly aligned seam.

